Making a sourdough starter is a repeated observation project. The useful result is a culture that grows predictably after feeding, not a jar that reaches a particular birthday. Plan for 7–14 days or longer. The listed flour and water quantities are a feeding supply, not ingredients to combine at once, and the final yield is about 150 g of active culture rather than a ready-to-eat portion.
Small-batch whole-wheat sourdough starter makes 1 servings, with 14 days estimated total time. View the standalone recipe page.
Make the jar easy to read
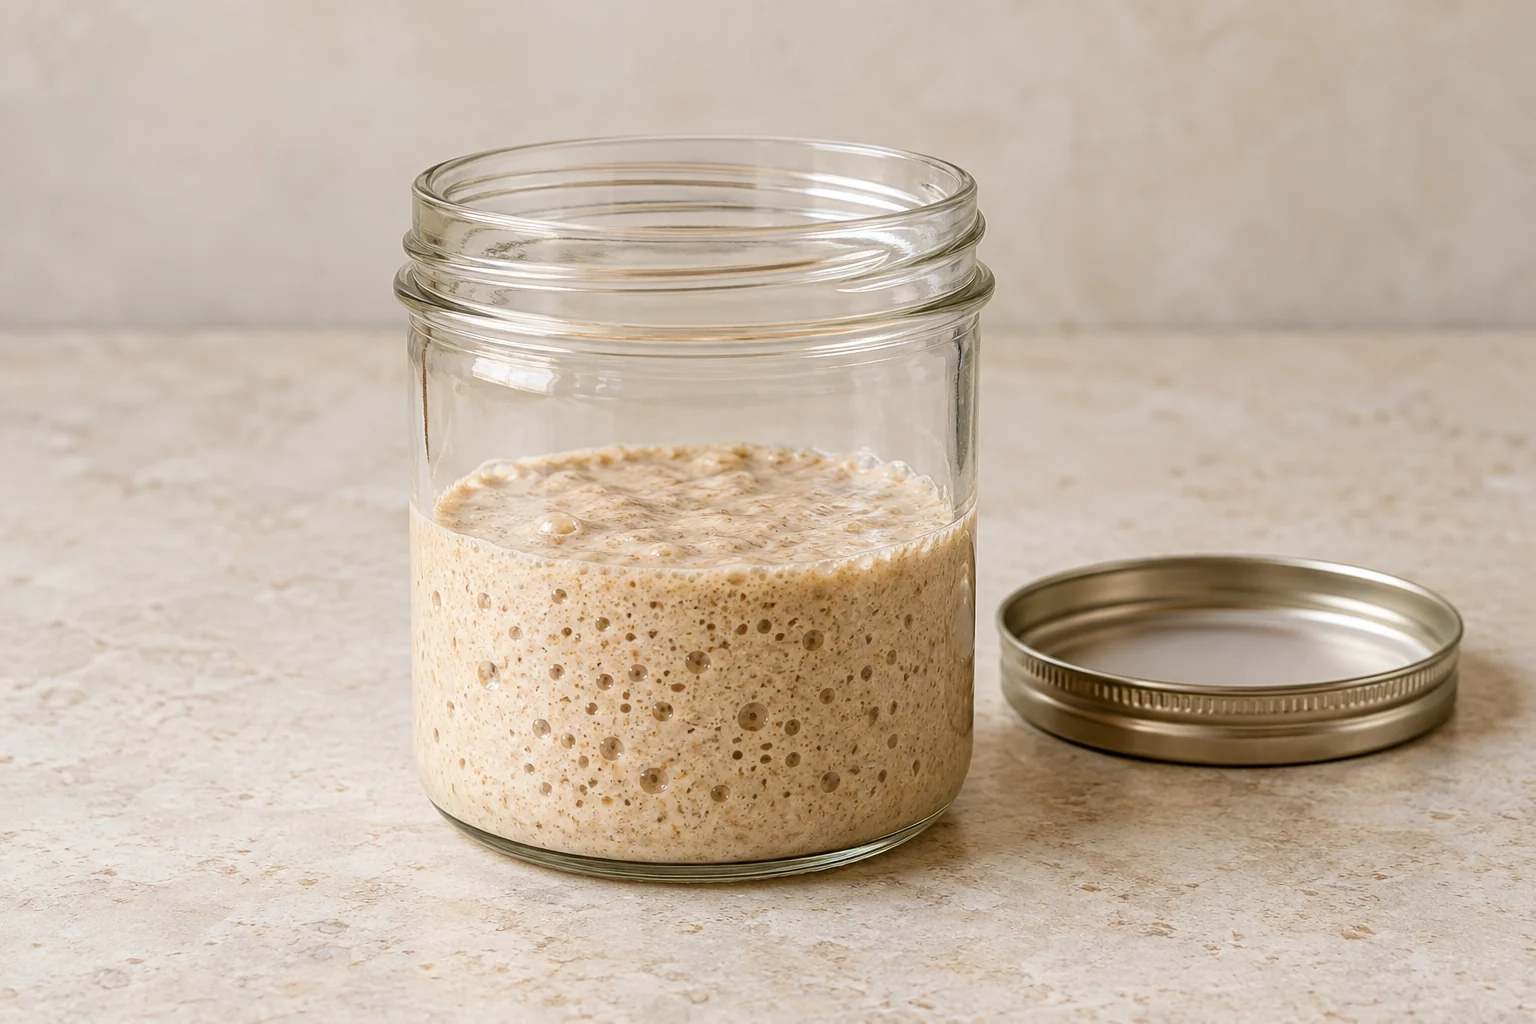
A clean, straight-sided 500–750 ml jar makes changes in height easier to judge than a bowl with sloping sides. Mark the level immediately after each feeding, then note when growth becomes visible and when the mixture reaches its highest point. Record feeding time, room temperature and rise.
Keep the jar loosely covered so fermentation gas can escape. Leave headroom and keep the rim clean. Use a steady 70–75°F location away from direct heat or a sunny windowsill.
Understand what each feeding replaces
The first mixture is whole wheat and water. Subsequent feeds use both whole-wheat and bread flour, so the established culture is not fed entirely on whole wheat. Retaining 20 g and adding 40 g combined flour plus 40 g water produces 100 g. That is a 1:2:2 starter-to-flour-to-water feeding by weight, with equal amounts of the two fresh flours.
Discarding the excess before feeding keeps the batch small and the fresh-food ratio consistent. Simply adding another spoonful to an ever-growing jar is a different routine. The 12-hour schedule begins on day three; weigh and record each feed.
Look for a repeatable rise after the early burst
A dramatic early expansion may be followed by a quiet period. Neither event alone proves success or failure. Keep observing the response to the scheduled feeds. Here, readiness means repeatedly at least doubling within about 6–8 hours, with bubbles throughout and a pleasantly sour aroma, over several consecutive feedings.
If growth remains slow, check the measured feed, temperature and observation times before changing several variables. A culture can rise and fall between checks, leaving a line on the jar above its current level. The stated fourteen days is planning time, and the ingredient supply may need replenishing if establishment takes longer.
Know which changes mean starting again
Throw away the entire culture if it develops fuzzy mold, pink or orange discoloration, or a putrid smell. Removing a visible patch does not make the remainder suitable to keep. Thoroughly clean the container and equipment before starting again. If an unusual appearance cannot be confidently distinguished from contamination, do not experiment by tasting it.
Raw flour and raw starter are not ready-to-eat foods. Never taste either to judge development. This recipe also keeps all discard from the establishment period out of food: throw it away rather than using it in pancakes or crackers. Recipes using mature-starter discard do not change that boundary for a new, still-developing culture.
Build enough for bread without using everything
Once the culture is reliably active, the final build retains 30 g and adds 60 g combined flour and 60 g water. Let that build become active before taking the 100 g needed for the linked boule. The remaining 50 g is your reserve for maintenance; using the whole jar in the dough would leave nothing to carry forward.
Equal overall flour and water weight makes this a 100% hydration starter. Hydration describes the flour-to-water relationship, not how full the jar is or how much it has risen. Measure rather than adding water until it resembles a photograph.
Move a mature culture into a manageable routine
Continue regular feeding at room temperature, or refrigerate a mature fed culture and refresh at least weekly as the card directs. Refrigeration is a maintenance option after reliable activity is established. Before the next loaf, allow enough room-temperature feedings to restore dependable growth rather than assuming a cold jar is immediately ready.
Keep maintenance and bread making as separate decisions: first confirm a healthy, active culture, then follow the bread recipe's fermentation and full baking method. If a feeding is delayed, record it and reassess the starter instead of trying to compensate by shortening the dough's rise.
Common questions
It doubled on day two. Can I bake now?
An early burst does not establish readiness. Continue the feeding routine until the growth target repeats over several consecutive feeds, with the other signs described above.
Do I need to leave the jar open to catch yeast?
No. Keep it loosely covered. A flour-and-water culture does not need an uncovered jar or commercial yeast added to start this process.
Technique & food-safety references
These primary references support the technique, safety and storage guidance. The recipe and cooking explanations are original Recipe Pinboard content.