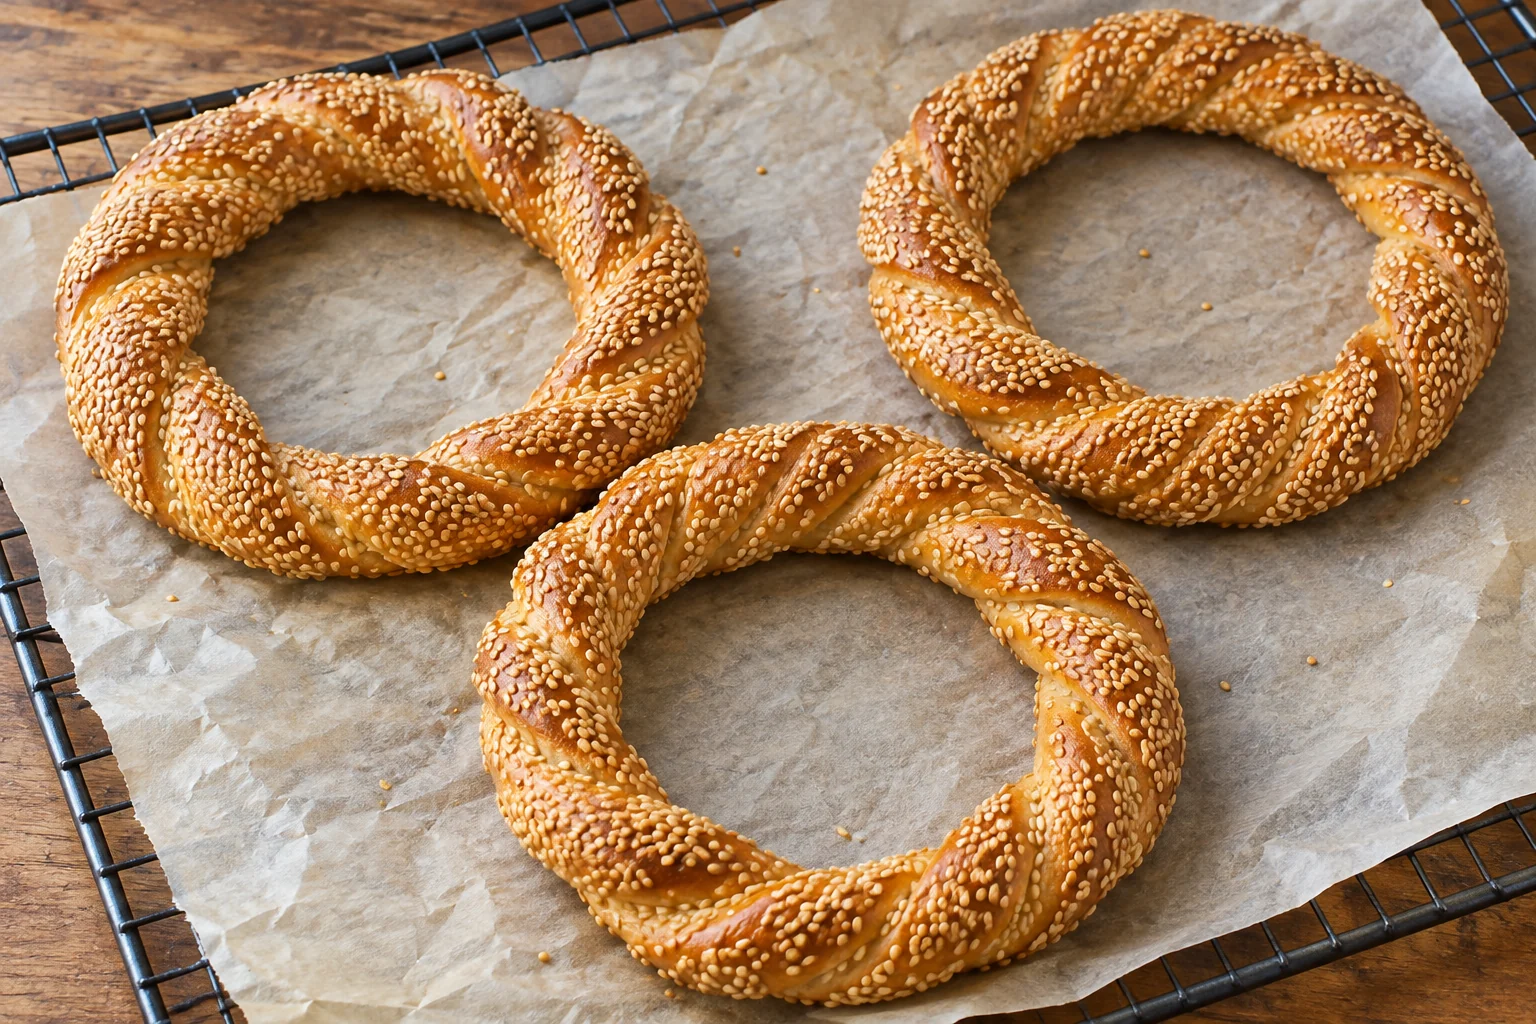
These rings are made from lean yeast dough twisted into open circles, coated and baked directly. There is no boiling stage. The thin ropes give a different proportion of crust to crumb from a thick bagel, and the honey wash helps the sesame adhere before baking. This is an original honey-coated variation inspired by the dipped-ring technique used for simit, without a claim that it reproduces a traditional molasses formulation.
Honey-dipped sesame bread rings makes 6 servings, with 4 hr estimated total time. View the standalone recipe page.
Organize the divided ingredients before kneading
Separate the dough water from the wash water, and reserve the small shaping-flour allocation before mixing. Activate the dry yeast in its portion of lukewarm water, then combine it with the remaining dough ingredients. Knead until the dough becomes smoother and elastic rather than stopping as soon as the flour disappears. The initial dough may feel slightly tacky; repeated additions of flour would make these relatively thin rings harder to extend. Use the measured bowl oil to coat the bowl and dough surface, then cover for the first rise. Judge expansion as well as the clock.
Rest the portions before stretching long ropes
Divide the risen dough into six similar pieces and leave them covered for their short rest. That pause makes it easier to extend each piece without tearing the surface. Roll from the middle outward with light pressure, making the rope reasonably even from end to end. If one rope springs back, set it aside under the cover and work on the next one. Avoid wetting the dough to make it stick to the counter; a little traction is useful, but a damp patch creates uneven handling. Use only the allotted shaping flour and incorporate clean surplus into the ropes.
Twist gently and leave a generous center opening
Fold each long rope in half and twist the strands together without stretching one side much tighter than the other. Bring the ends around into a circle and pinch the join firmly. The center opening needs room to shrink as the dough expands during proofing and baking, so begin with the stated open diameter. Put the join beneath the ring where practical. A tightly wound small circle may become almost closed, while a weak join can open into a curved stick. Both problems are easier to correct before the sticky coating is applied.
Apply the measured wash and sesame across all rings
Mix the honey and warm water until no thick honey remains at the bottom of the dish. Briefly turn each ring through the shallow wash, then coat both faces with sesame and transfer it to parchment. Brush the remaining wash over the six rings and press on the remaining seeds rather than discarding a large bath of sweet liquid. Handle the dough gently so its twist stays visible. Leave space between rings for proofing. They should become visibly puffy before baking, but the coating does not need to look dry or form a hard shell first.
Rotate the trays and cool before opening the crumb
Bake with enough airflow around both trays, exchanging their positions and rotating them at the stated point. Look for a rich golden crust and evenly colored sesame, not a pale underside hidden by an attractive top. If only one tray fits properly, keep the second refrigerated during the first bake and allow extra time. Cool the rings on racks for at least twenty minutes so steam can escape from their undersides. The four-hour schedule includes activation, rising, shaping, baking and cooling; a cool room may extend it. These breads contain honey and must not be served to children younger than twelve months.
Common questions
Why did the center holes nearly close?
The starting opening may have been too small, or the ropes may have been too thick. Shape a generous opening and keep the two strands evenly sized. Do not try to cut a hole into a hot finished ring; adjust shaping on the next batch.
Can I keep the rings for several days?
They are best on the day made. Keep covered at room temperature for up to one day, or freeze fully cooled rings for up to two months. Slice before freezing if useful, then warm the portion needed rather than repeatedly reheating the entire batch.
Technique & food-safety references
These primary references support the technique, safety and storage guidance. The recipe and cooking explanations are original Recipe Pinboard content.