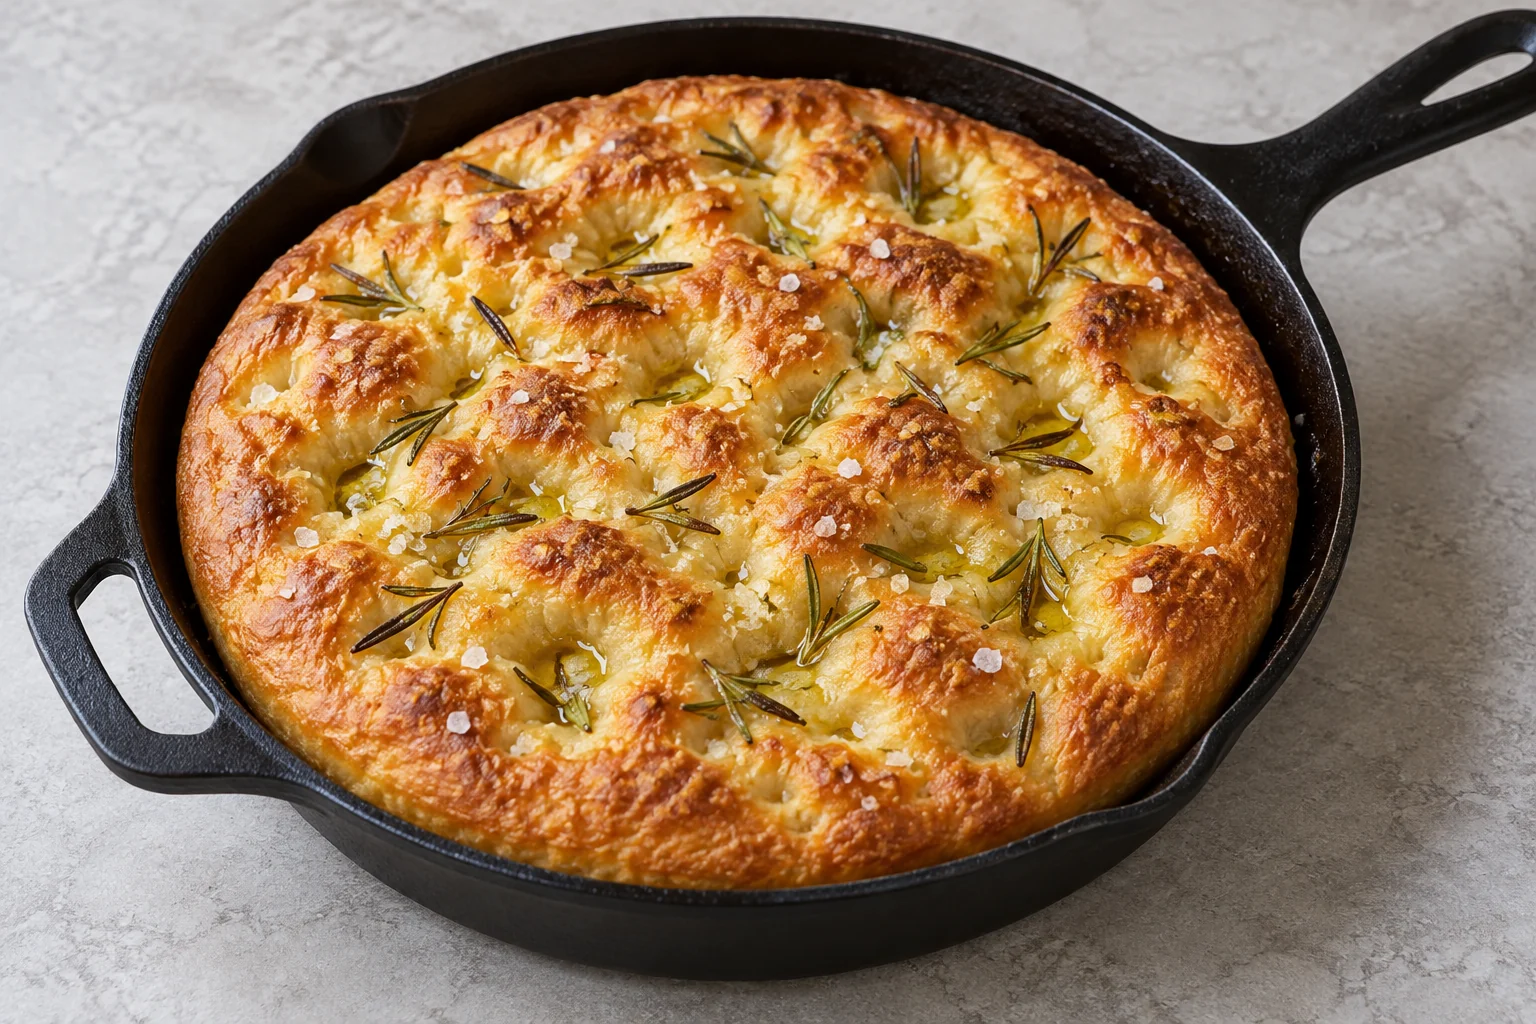
This rosemary skillet focaccia is a same-day bread, but it is not a one-hour shortcut. Its five-hour planning window makes room for rests, folds, rising, baking and cooling. The dough contains 280 g water for 350 g flour, so it is deliberately sticky. A scale and a little patience are more useful here than trying to turn it into a firm dough with extra flour.
Rosemary skillet focaccia makes 8 servings, with 5 hr estimated total time. View the standalone recipe page.
Keep the dough wet and use the measured oil
Mix bread flour, instant yeast and fine salt before adding the water and the first portion of olive oil. Stir until no dry flour remains, then cover for the first twenty-minute rest. The dough will look rough and wet. That is consistent with this recipe, not an instruction to knead in extra flour until it feels like a sandwich loaf.
The total 45 g oil is divided among the dough, the skillet and the surface. Keep those uses separate. Oil on the pan contributes to the crisp base and edge, while the final drizzle settles into the dimples. Adding a freehand extra pour changes the recipe amount, so measure the three portions if you want a repeatable result.
Fold gently instead of kneading on a floured counter
Wet your hand, lift one side of the dough and fold it over the center. Work around the bowl for four folds, then cover it again. The rests between sets give the dough time to relax. A gentle stretch is useful; pulling until the dough tears is not. If it resists strongly, finish the set without forcing a long stretch.
There are three sets of folds spaced twenty minutes apart after the initial rest. Keep the dough in its bowl rather than scattering flour over a worktop. This limits handling and preserves the intended hydration. A flexible scraper can help gather dough from the sides, but there is no need to make its surface perfectly smooth at every stage.
Use visible growth to guide the first rise
After the folds, let the covered dough rise until it is visibly aerated and roughly doubled. The suggested 60–90 minutes assumes a room around 70–75°F. A cooler kitchen can take longer, and unusually warm dough may move faster. The five-hour total is a planning estimate, not a command to bake dough that has barely changed.
Look for a fuller volume and bubbles rather than relying on a single isolated large bubble. Avoid repeatedly punching or stirring the dough while checking it. If your bowl is wide and opaque, noting the starting level on its side can help you judge the change. Do not add yeast late in the process because the first half hour looks quiet.
Let the skillet proof happen before dimpling
Coat the 25 cm cast-iron skillet with its measured oil and transfer the dough gently. Give it fifteen minutes to relax before easing it toward the edges. If it springs back, stop pulling and let it relax rather than tearing it. The subsequent covered proof should leave it puffy, which gives the final dimples something airy to shape.
Preheat the oven during the last part of proofing. Drizzle the final oil, then press oiled fingertips straight down to form dimples. Avoid sweeping your fingers sideways across the whole surface and flattening it. Add rosemary and flaky salt immediately before baking. A substantially larger skillet would create a thinner loaf and a different baking schedule.
Brown the base and cool before cutting
Bake until the surface is deeply golden and the interior is cooked through. The recipe includes an approximate internal temperature check in addition to appearance. A browned top alone does not tell you whether a thick center has finished. If your oven heats unevenly, rotate carefully near the end without leaving the door open for a long time.
The skillet handle stays hot after it leaves the oven. Use mitts and let the loaf rest briefly before moving it onto a rack. Keeping the whole cooling period inside the skillet traps steam against the base. Wait at least twenty minutes on the rack before cutting into eight wedges, then store only fully cooled bread. Raw dough should never be tasted.
Common questions
Why did my focaccia turn out dense?
Possible contributors include extra flour, insufficient visible rise, rough degassing or baking before the skillet proof is complete. Follow the measured hydration and use the dough’s growth along with the time ranges. No single photograph can diagnose a particular loaf.
Can I use active dry yeast instead?
The recipe specifies instant yeast. Another type can require different preparation and timing, so follow its manufacturer’s directions and expect to reassess the rise. Do not assume a different yeast product has exactly the same schedule.
Technique & food-safety references
These primary references support the technique, safety and storage guidance. The recipe and cooking explanations are original Recipe Pinboard content.