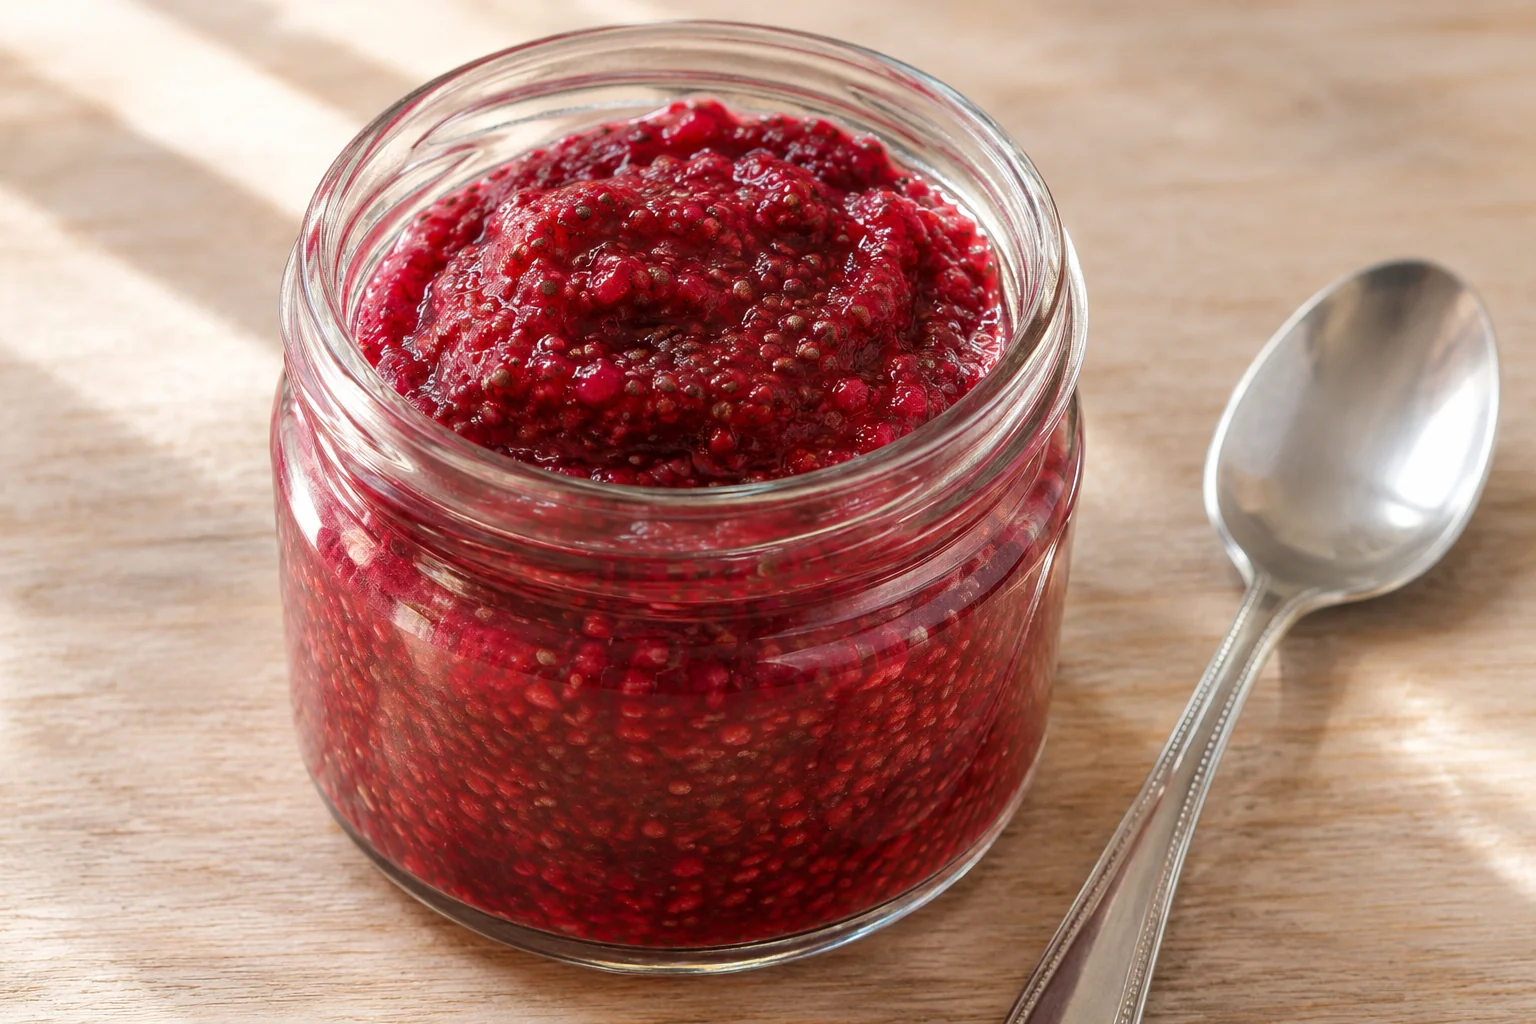
This spread uses mashed raspberries and hydrated chia seeds for a soft, spoonable texture. It is not a clear jelly, a strained fruit puree or a shelf-stable preserve. The seeds are part of the finished spoonful, and the modest maple addition leaves the fruit's tartness noticeable. Most of the elapsed time belongs to cooling and hydration, so begin well before you want to spread it on breakfast.
Raspberry & chia refrigerator spread makes 12 servings, with 1 hr 45 min estimated total time. View the standalone recipe page.
Prepare the fruit before heating the small batch
Sort the raspberries and discard any spoiled fruit, then rinse gently and let excess wash water drain away. Weigh the usable berries rather than the entire purchased package. A small heavy saucepan gives enough room to stir without spreading this quantity into an excessively thin layer. Add the measured water and maple syrup with the berries before switching on the heat. This protects the fruit during the first moments before its own juice begins to collect. Keep a flexible spatula nearby so you can reach the pan's edges without crushing fruit against a sharp utensil.
Mash to a recognizable fruit texture
Heat gently and stir as the berries collapse, then mash them with the back of a spoon. Stop when there are no large firm pockets but small pieces of fruit remain. The six-to-eight-minute cooking interval softens the berries; it is not a jam-making race to a very high sugar temperature. If the base catches, reduce the heat immediately rather than scraping scorched material into the spread. There is no sieve step: raspberry seeds and pulp stay together, giving the finished mixture its characteristic texture and deep red appearance.
Distribute the chia before it starts thickening
Stir in the lemon juice and chia, scattering the seeds over the surface rather than dumping them into one mound. Work through the corners and bottom of the saucepan so every spoonful contains hydrated seeds. Continue the brief cooking stage while stirring, then transfer the mixture to a shallow heatproof container. Chia does not disappear into the fruit like dissolved sugar. Expect small visible seeds surrounded by softened fruit, and do not judge the result by the glossy surface or clean-cut set of a traditional strained jelly.
Let cooling and refrigeration finish the work
Allow the short initial stand in the shallow container and stir twice as instructed. Those extra stirs break up any clusters before the mixture gets thicker. Move it into the refrigerator for at least an hour; a deep, narrow jar would cool less evenly than a shallow container. The full recipe allows 105 minutes, including the cooling and hydration stages. If you spoon it while warm, it will look looser than the chilled result. Resist adding another handful of dry chia at that point, which could leave a stiff or unevenly hydrated spread later.
Use a clean spoon and keep it refrigerated
Once chilled, transfer the spread to a clean covered container if desired. Store it at 40°F or colder and use it within three to four days. A jar is only a serving or storage vessel here: it does not turn this preparation into a canned product. Do not store it in a cupboard or rely on a lid drawing down as evidence of preservation. Scoop with a clean utensil instead of returning a toast-covered knife to the container, and put the remaining spread back in the refrigerator promptly after serving.
Common questions
Why is the spread still loose after cooking?
Its final texture depends on the chia hydrating during the cooling and chilling stages. Wait through the full refrigeration time before judging it. Fruit moisture also varies, so expect a soft spread rather than a firm sliceable gel.
Can I remove the raspberry seeds?
Straining would remove some fruit solids and alter the recipe. This version deliberately retains both raspberry and chia seeds. For a seedless result, choose a formulation designed for strained fruit instead of removing material midway through this one.
Technique & food-safety references
These primary references support the technique, safety and storage guidance. The recipe and cooking explanations are original Recipe Pinboard content.